codex-lv3-may-2025
Supabase Database Setup Guide
Learn how to set up a cloud database for your React applications using Supabase - a free, easy-to-use backend platform.
What is Supabase? An open-source Firebase alternative that provides a PostgreSQL database, authentication, storage, and real-time subscriptions.
Why Use Supabase?
- ✅ Free tier - Perfect for learning and small projects
- ✅ Real database - PostgreSQL (professional-grade)
- ✅ Easy to use - Simple web interface and JavaScript client
- ✅ No backend required - Connect directly from React
- ✅ Real-time updates - Data syncs automatically
Prerequisites
Before you begin:
- Email address for account creation
- Basic understanding of tables and rows
- React project ready (optional, for later connection)
Time Required: 15-20 minutes
Step 1: Create Your Supabase Account
Go to supabase.com and create a free account.
Show Me
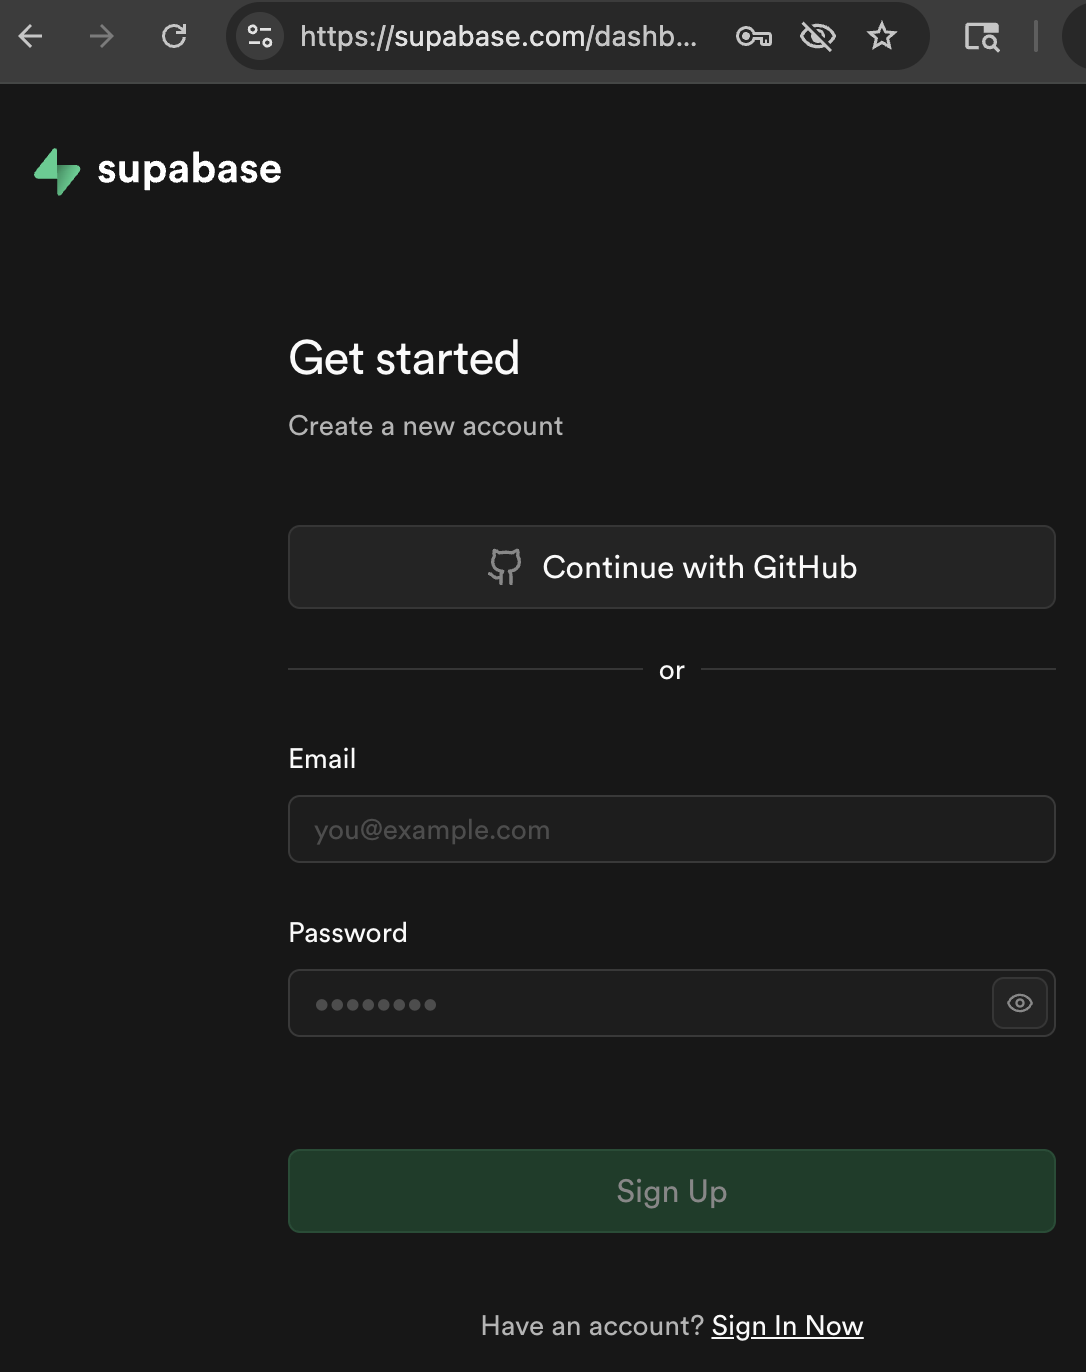
💡 Tip: Use your school or personal email. You’ll need to verify your email address.
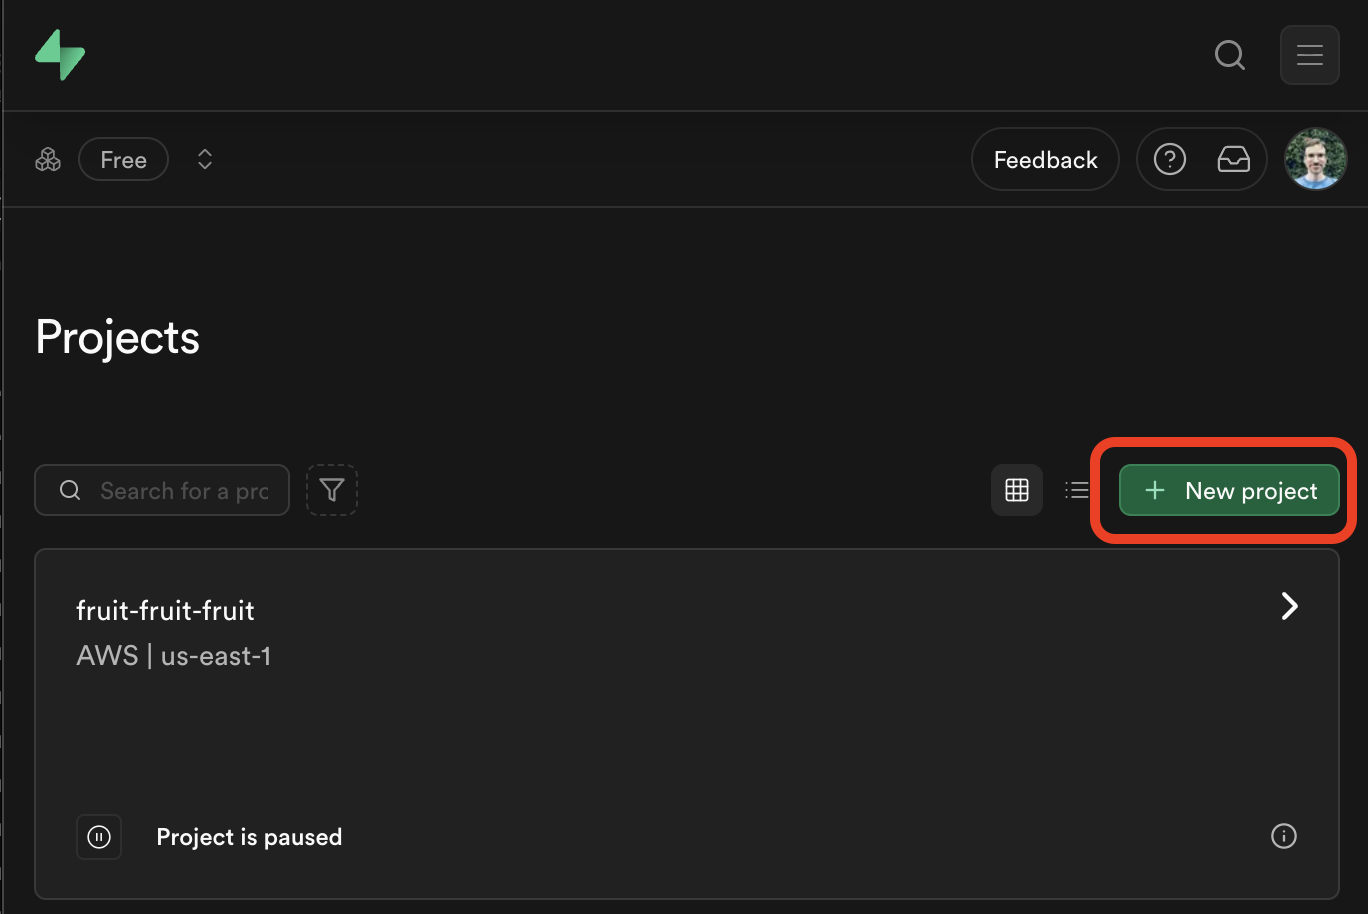
Step 2: Create a New Project
After logging in, click “New Project” to start.
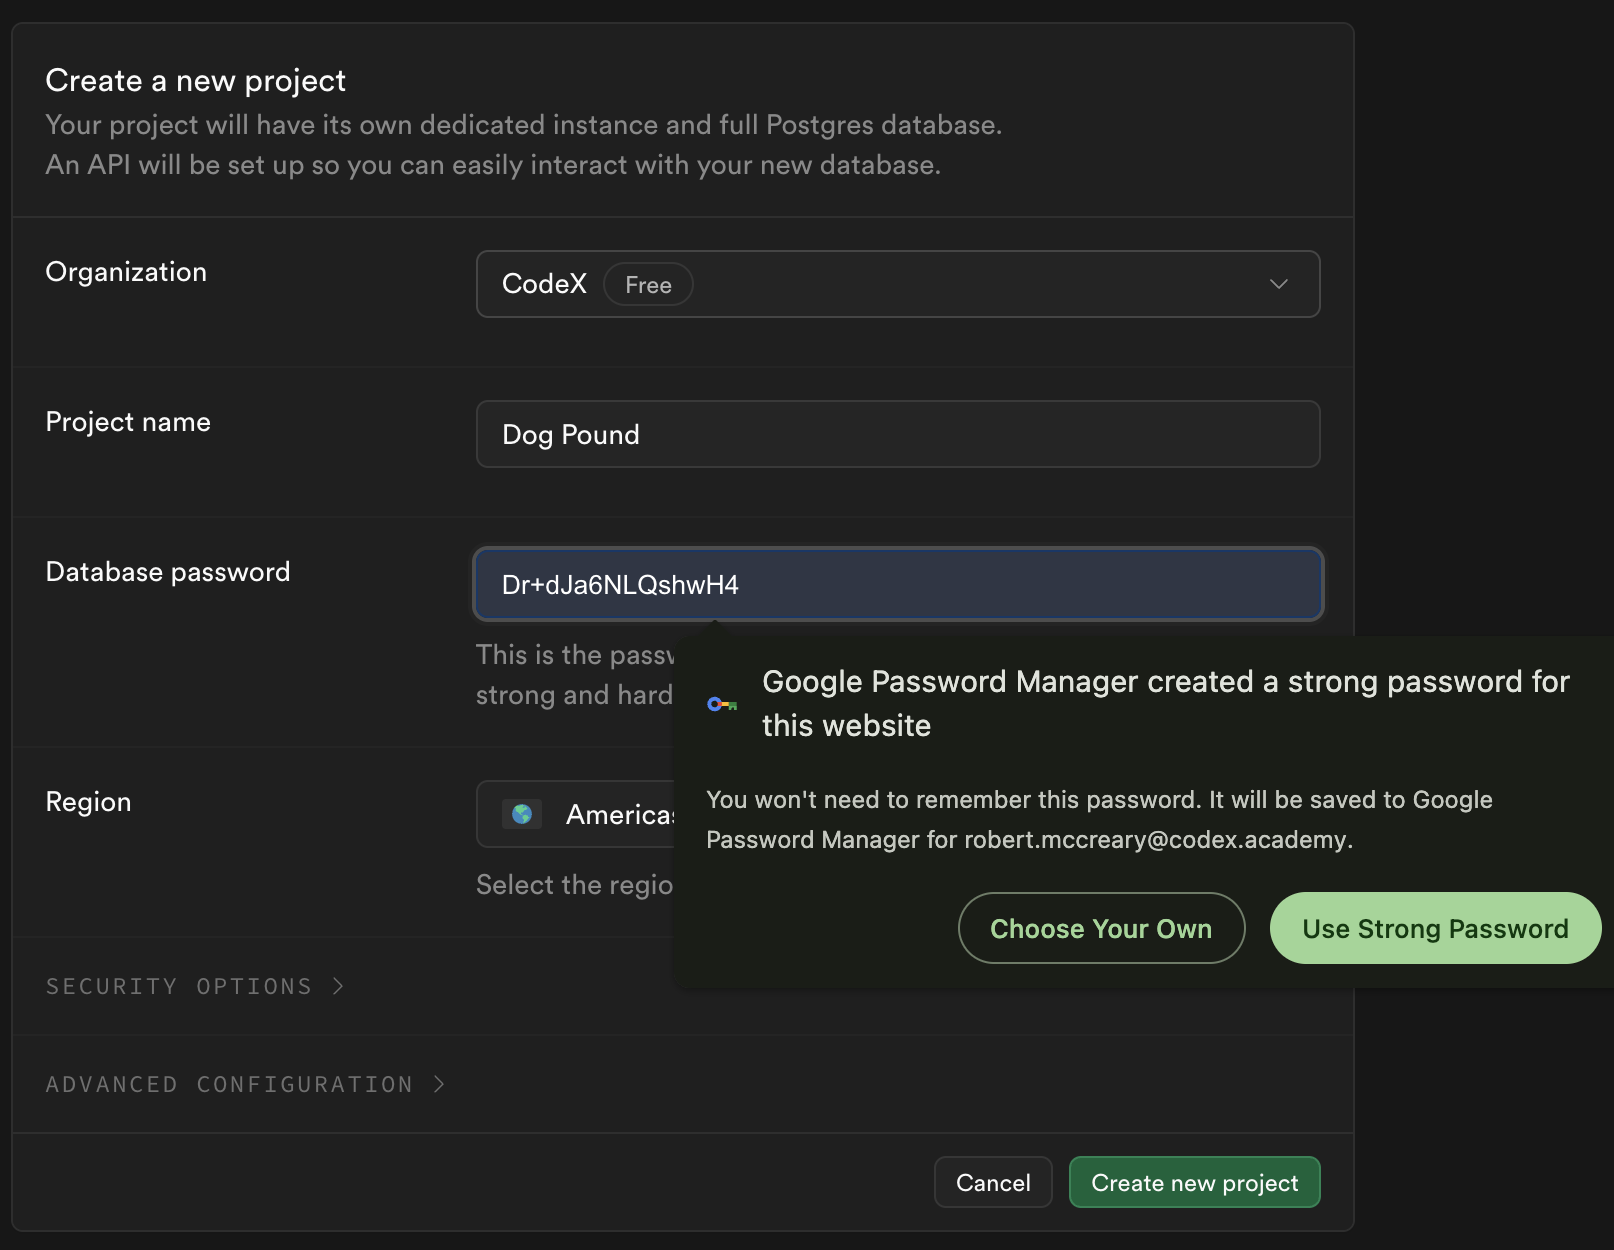
Show Me
What to enter:
- Project Name: Choose a descriptive name (e.g., “my-todo-app”)
- Database Password: Create a strong password and save it somewhere safe!
- Region: Choose the closest region to you for best performance
Step 3: Set Up Your Database
Wait for your project to finish setting up (this takes 1-2 minutes). You’ll see a loading screen while Supabase creates your database.
Show Me
⚠️ Important: Save your database password! You’ll need it to connect from your app.
What’s happening: Supabase is creating a PostgreSQL database, setting up authentication, and configuring your project.
Step 4: Navigate to the Table Editor
Once your project is ready, click on the Table Editor icon in the left sidebar.
Show Me
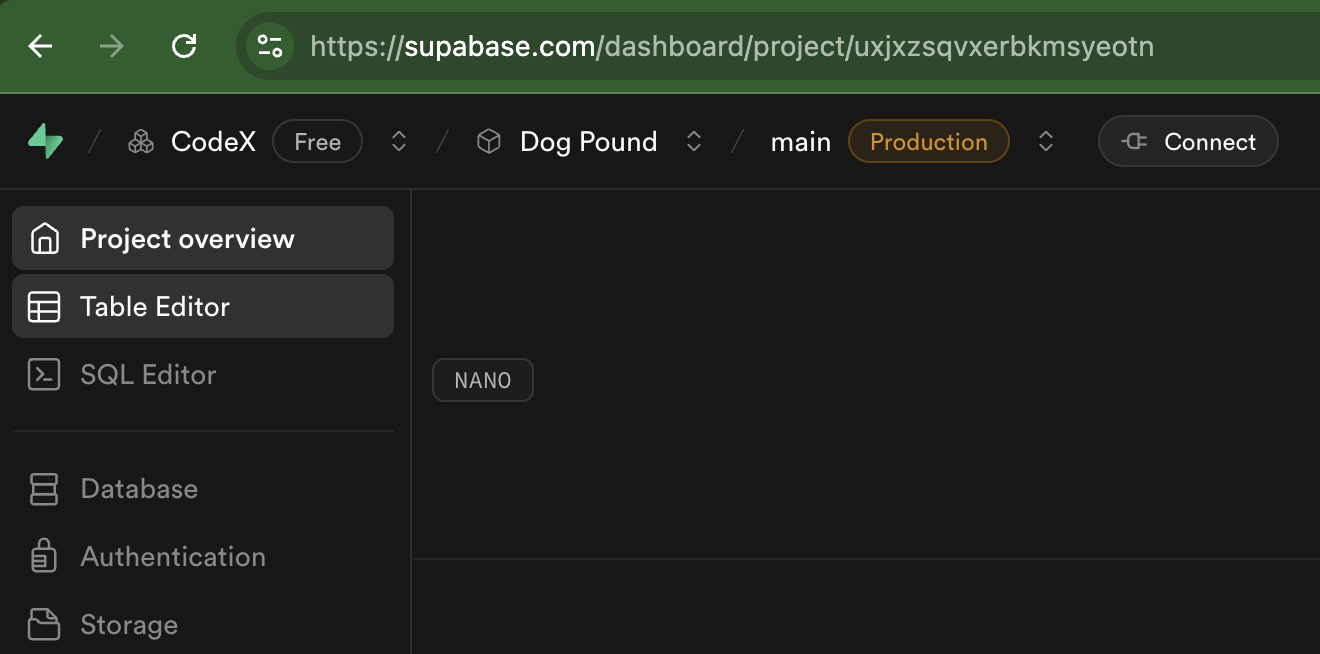
What is the Table Editor? A visual interface for creating and managing database tables - think of it like a spreadsheet for your data.
Step 5: Create Your First Table
Click “New Table” to create a table for your data.
Show Me
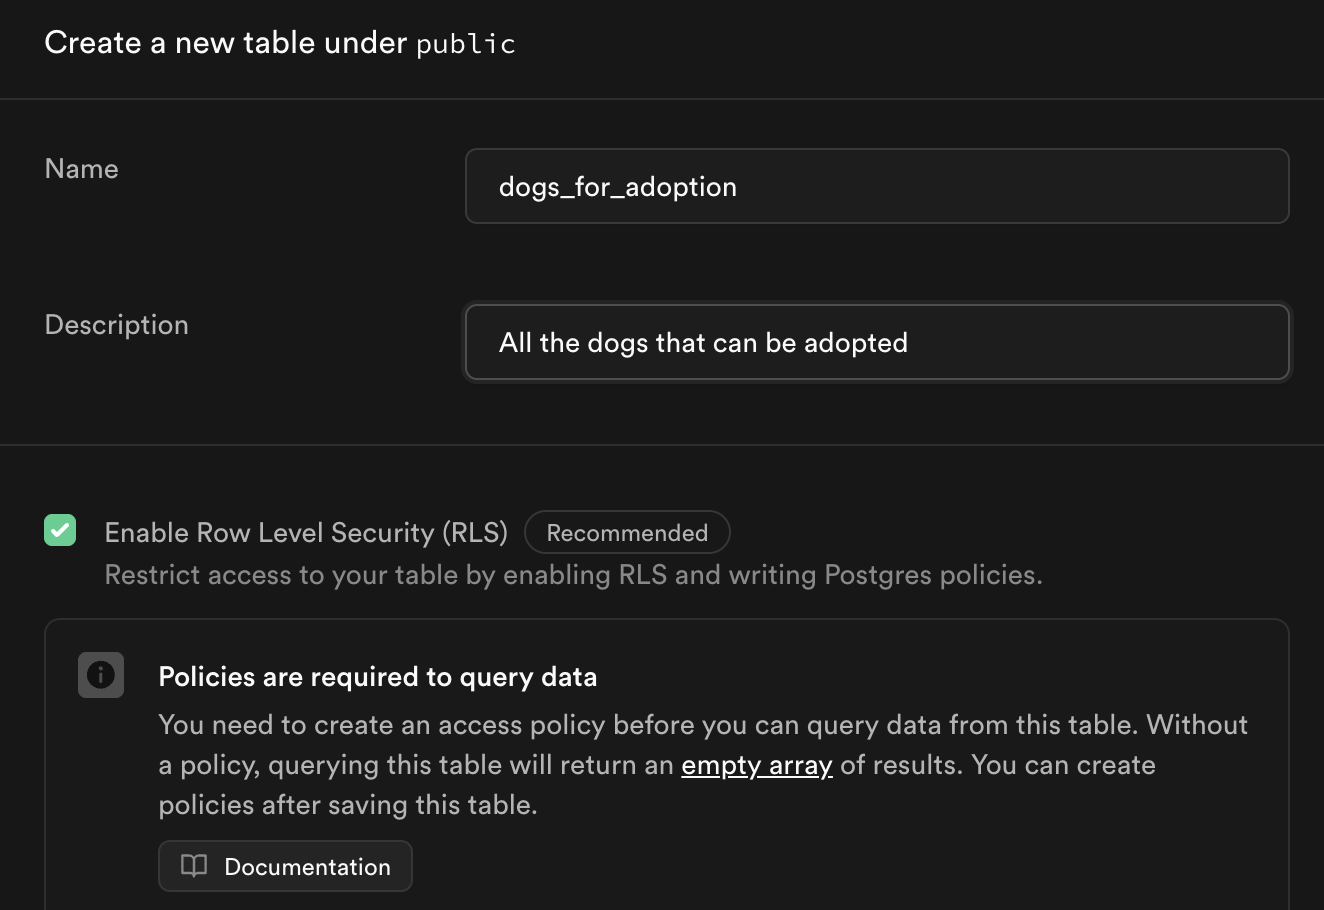
What to enter:
- Table Name: Use a descriptive name (e.g., “todos”, “products”, “students”)
- Enable Row Level Security (RLS): ✅ Keep this checked (we’ll set up policies next)
- Enable Realtime: Optional - check if you want live updates
💡 Naming Tips:
- Use lowercase
- Use plural names (todos, not todo)
- No spaces (use underscores:
user_profiles)
Step 6: Add Columns to Your Table
Define what information each row will store by adding columns.
Show Me
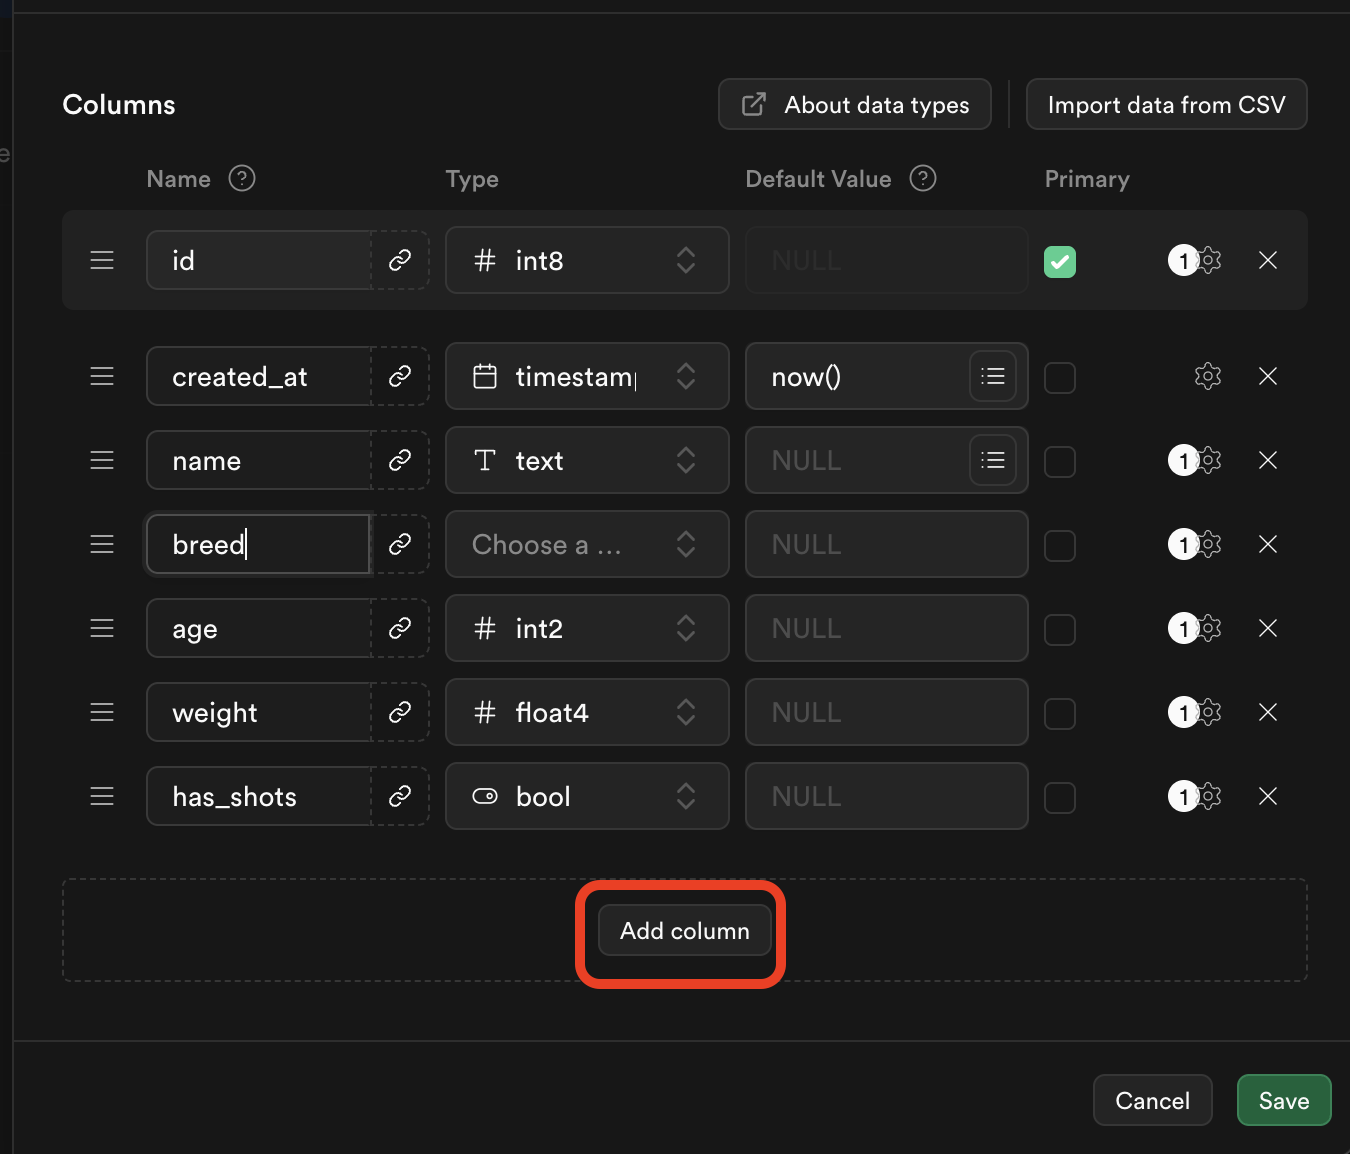
Example for a Todo List App:
| Column Name | Type | Options |
|---|---|---|
| id | int8 | Primary key, auto-increment (created automatically) |
| created_at | timestamptz | Default: now() (created automatically) |
| task | text | Required |
| completed | bool | Default: false |
| priority | text | Optional |
Common Column Types:
- text - For strings (names, descriptions)
- int8 - For whole numbers
- bool - For true/false values
- timestamptz - For dates/times
- numeric - For decimal numbers
💡 Tip: The id and created_at columns are added automatically - you usually don’t need to change these!
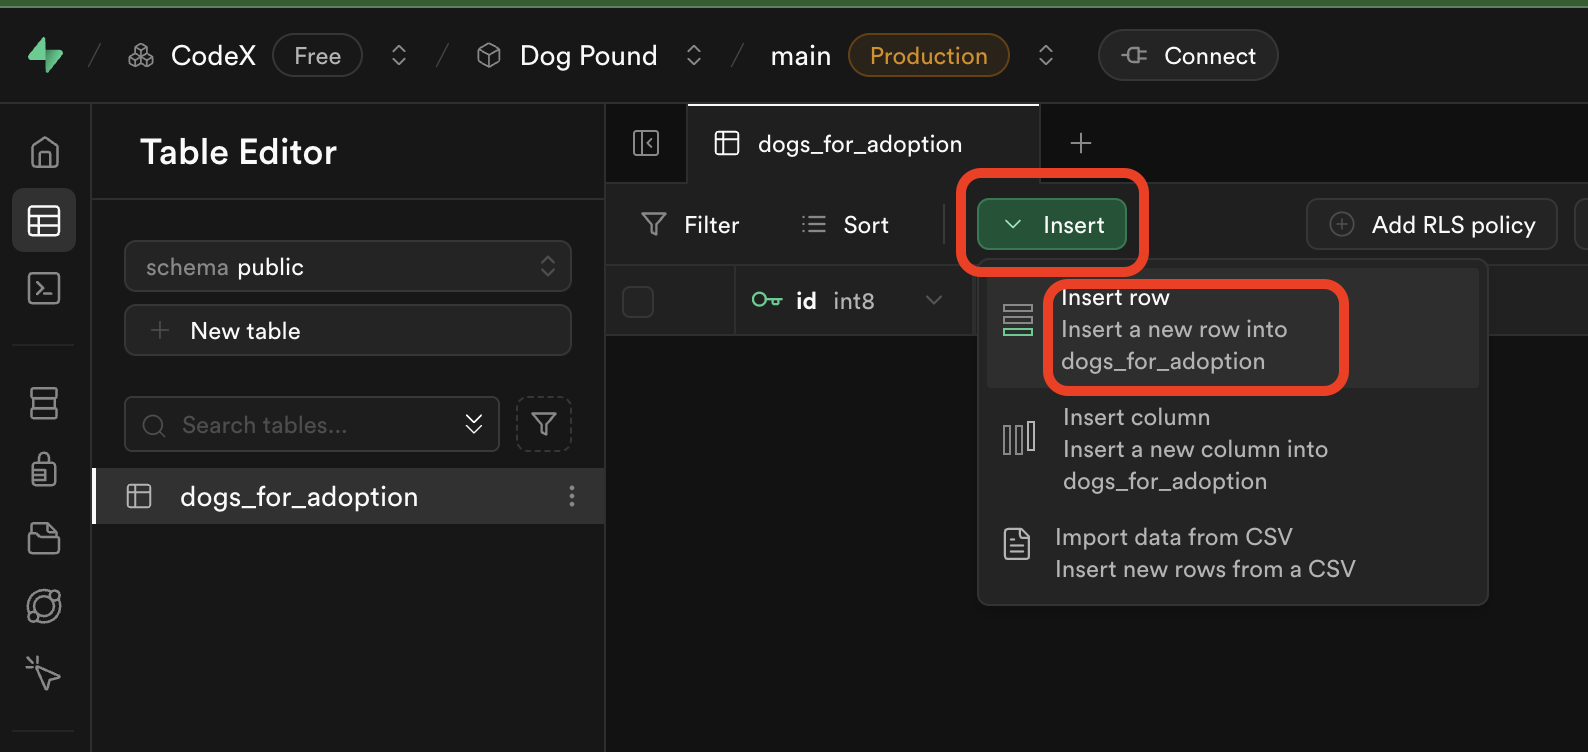
Step 7: Insert Your First Row (Part 1)
Click “Insert” → “Insert row” to add data to your table.
Show Me
Step 8: Enter Row Data (Part 2)
Fill in the values for your new row.
Show Me
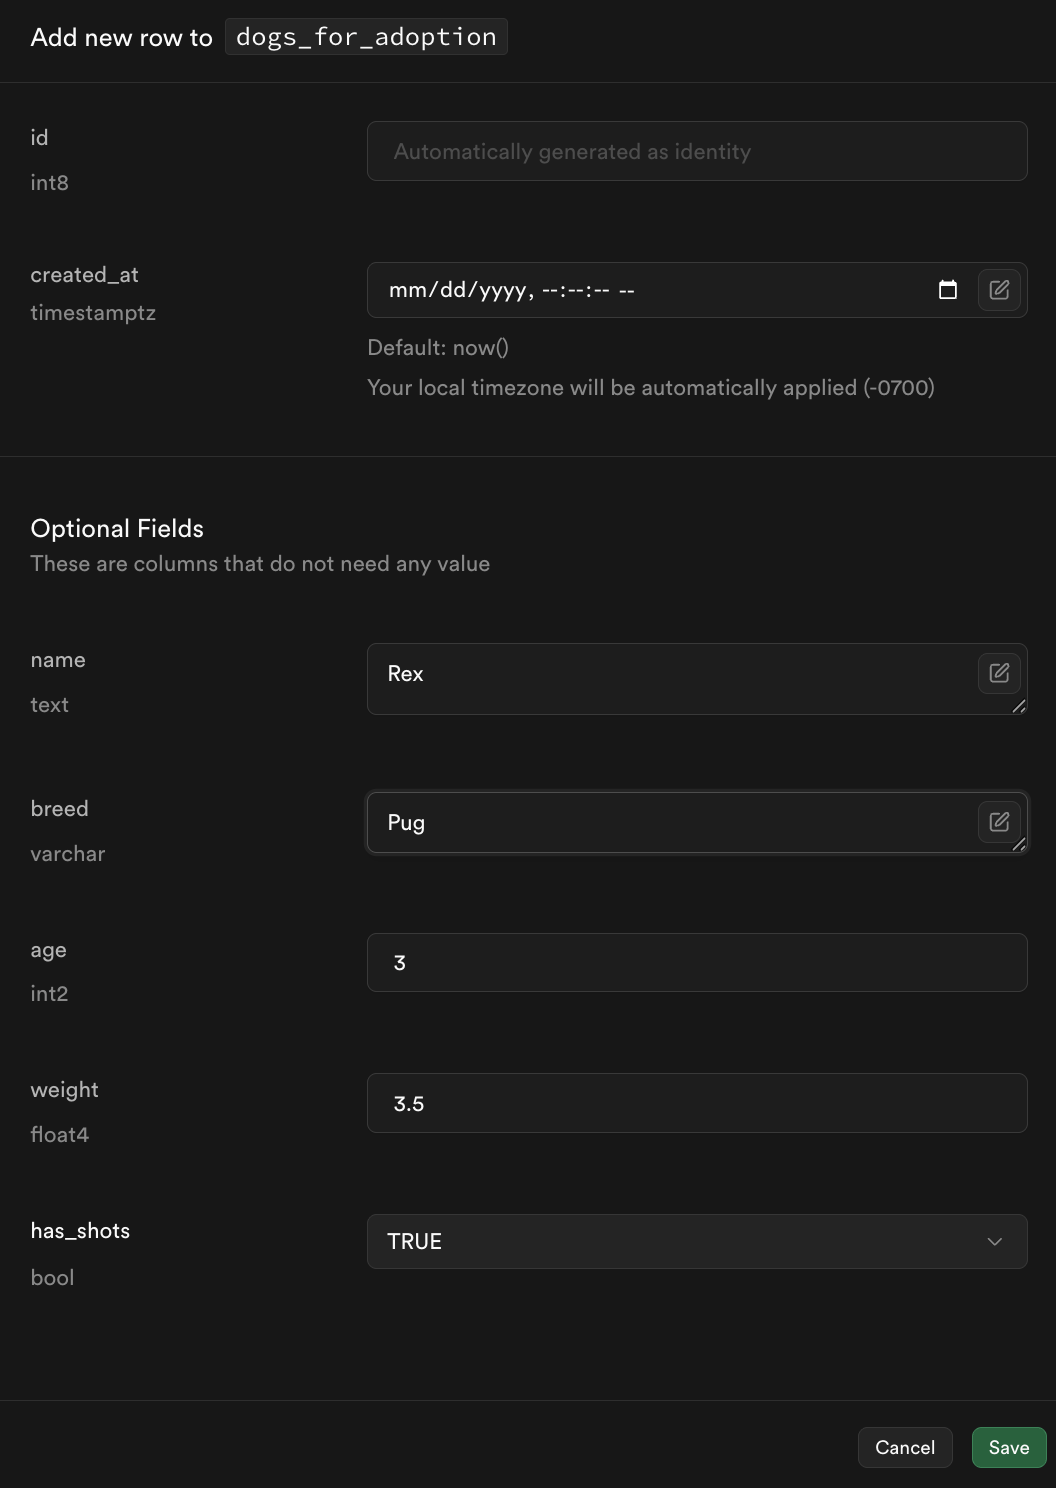
Example for Todo List:
- task: “Learn Supabase”
- completed: false
- priority: “high”
Note: You don’t need to fill in id or created_at - these are auto-generated!
Click “Save” when done.
Step 9: Add More Data
Add at least 3 rows of data to your table. This will help you test your app later!
💡 Practice Tip: Add diverse data to test different scenarios:
- Mix of completed and incomplete todos
- Different priority levels
- Variety of task types
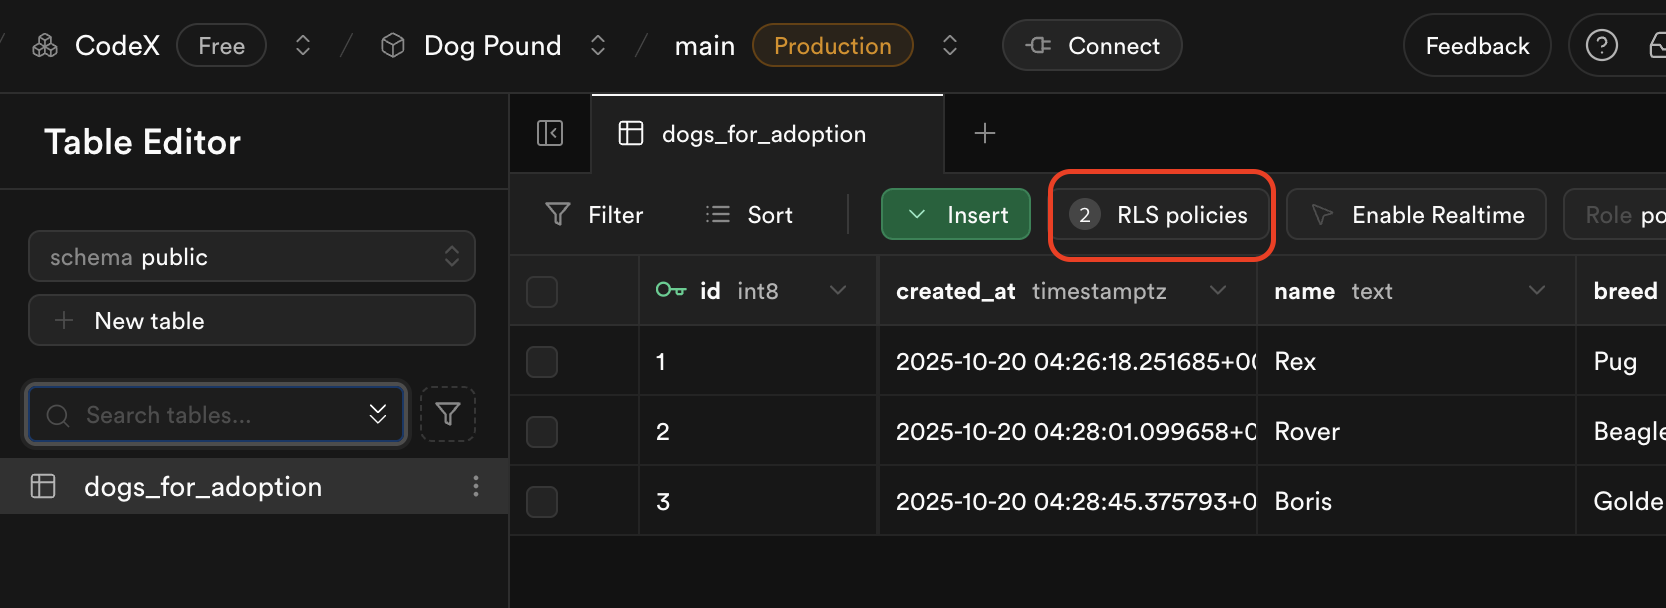
Step 10: Set Up Read Policy (Allow Public Read Access)
To let your React app read data, you need to set up security policies.
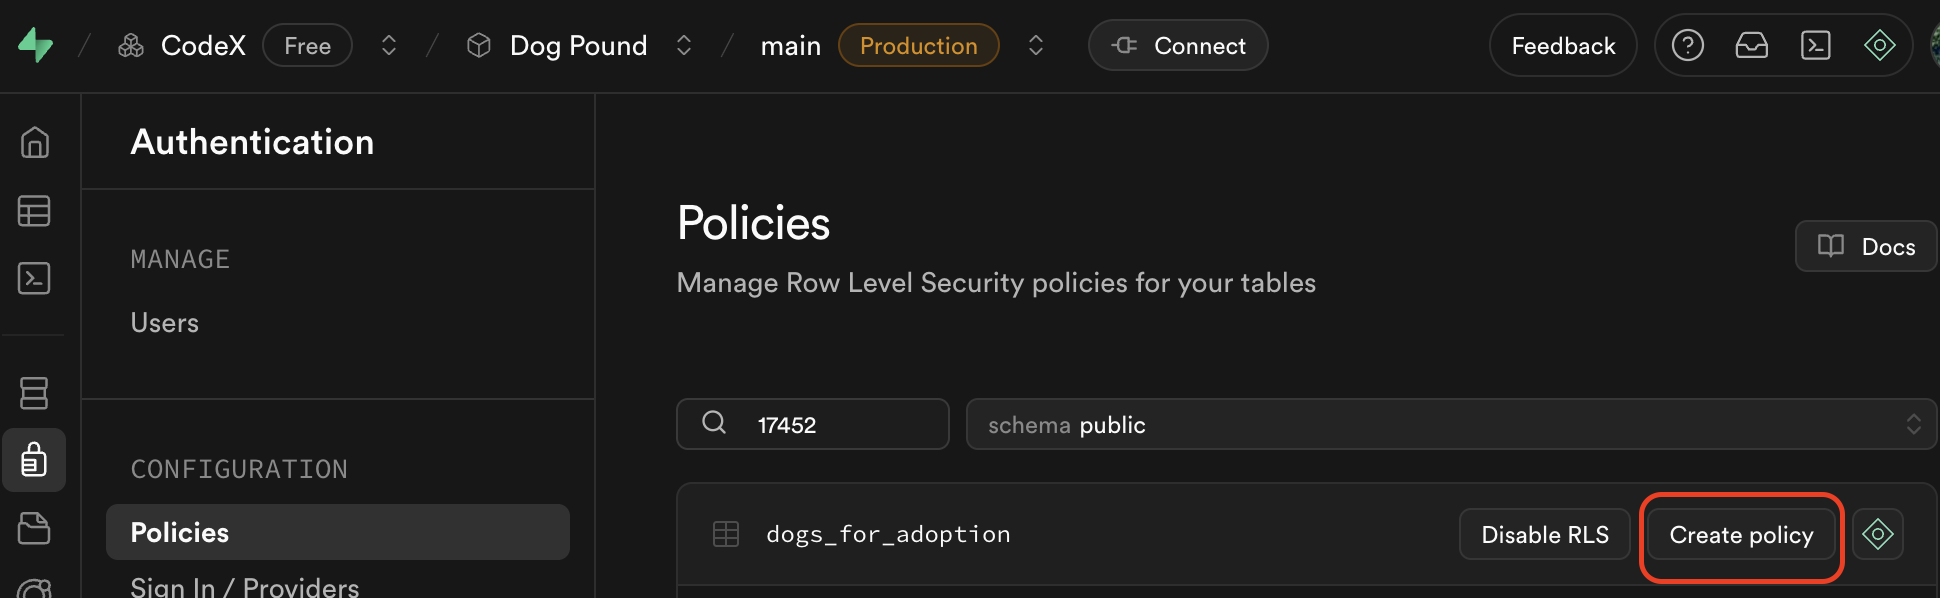
Click on “RLS” (Row Level Security) or “Policies” tab, then click “New Policy”.
Show Me
This opens the policy creation screen where you can configure security rules.
Show Me
Select the first template on the left: “Enable read access for all users”
Show Me
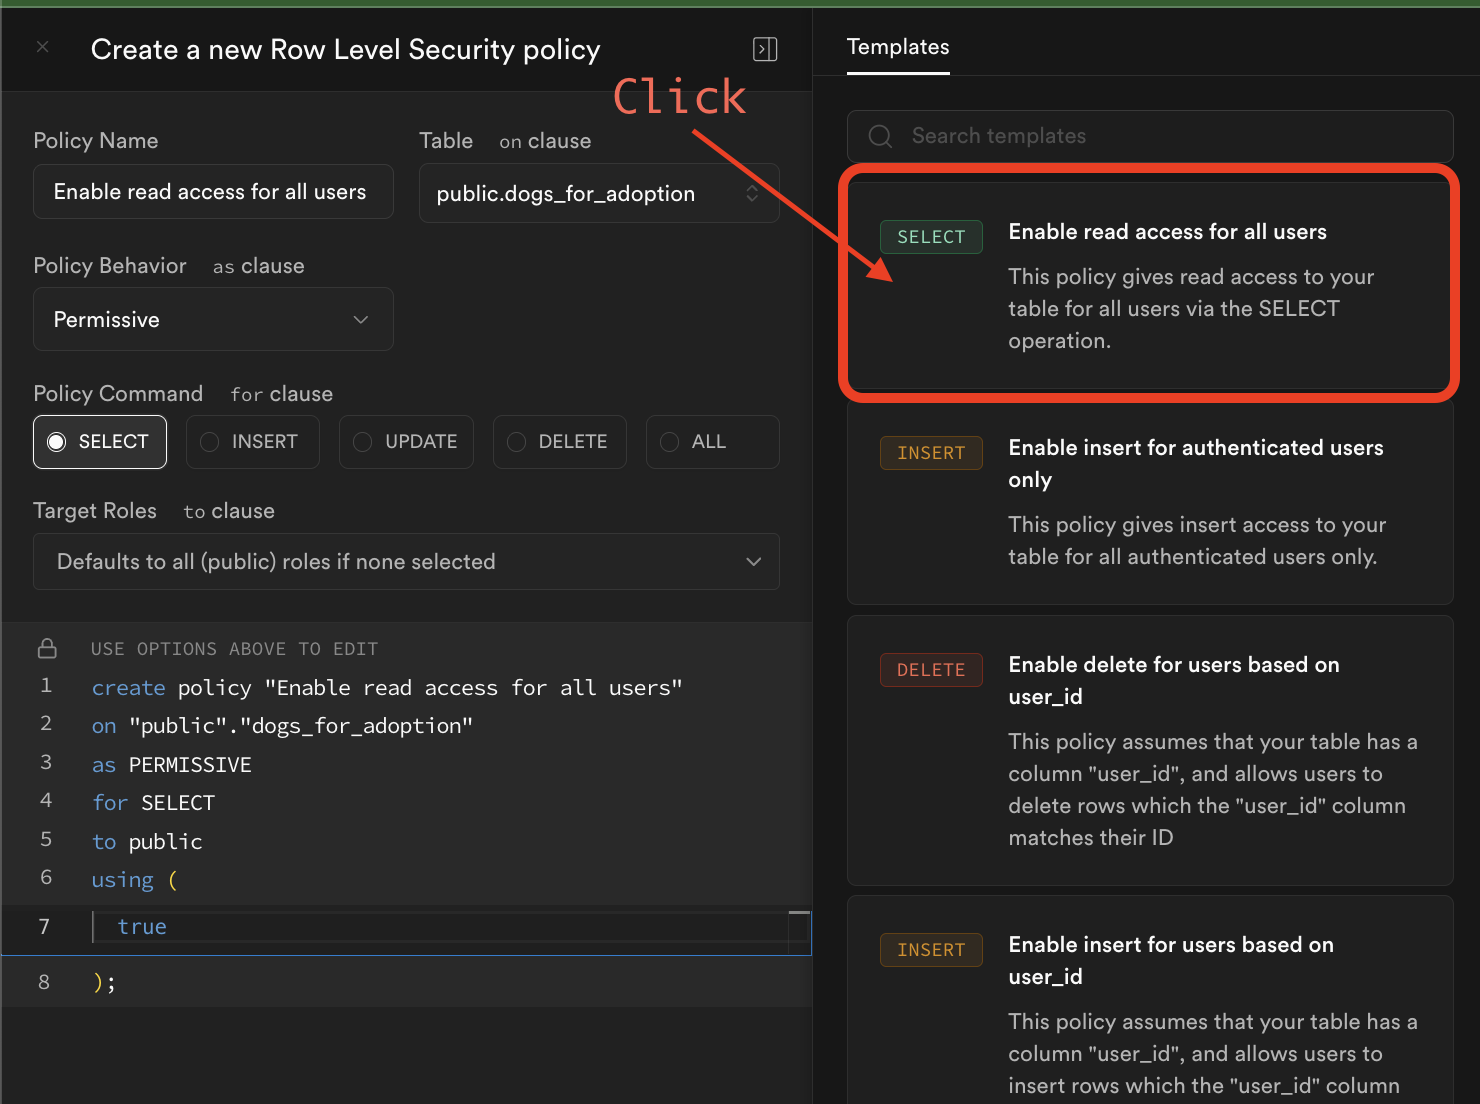
This allows anyone to read your data (perfect for demo apps and learning projects).
When to use this:
- Learning projects and demos
- Public data that anyone can view
- Apps without user accounts
⚠️ Security Note: For production apps with private data, you’ll want more restrictive policies!
Step 11: Set Up Write Policy (Allow Public Write Access)
To let your React app create new data, add another policy.
Click “New Policy” again.
Show Me
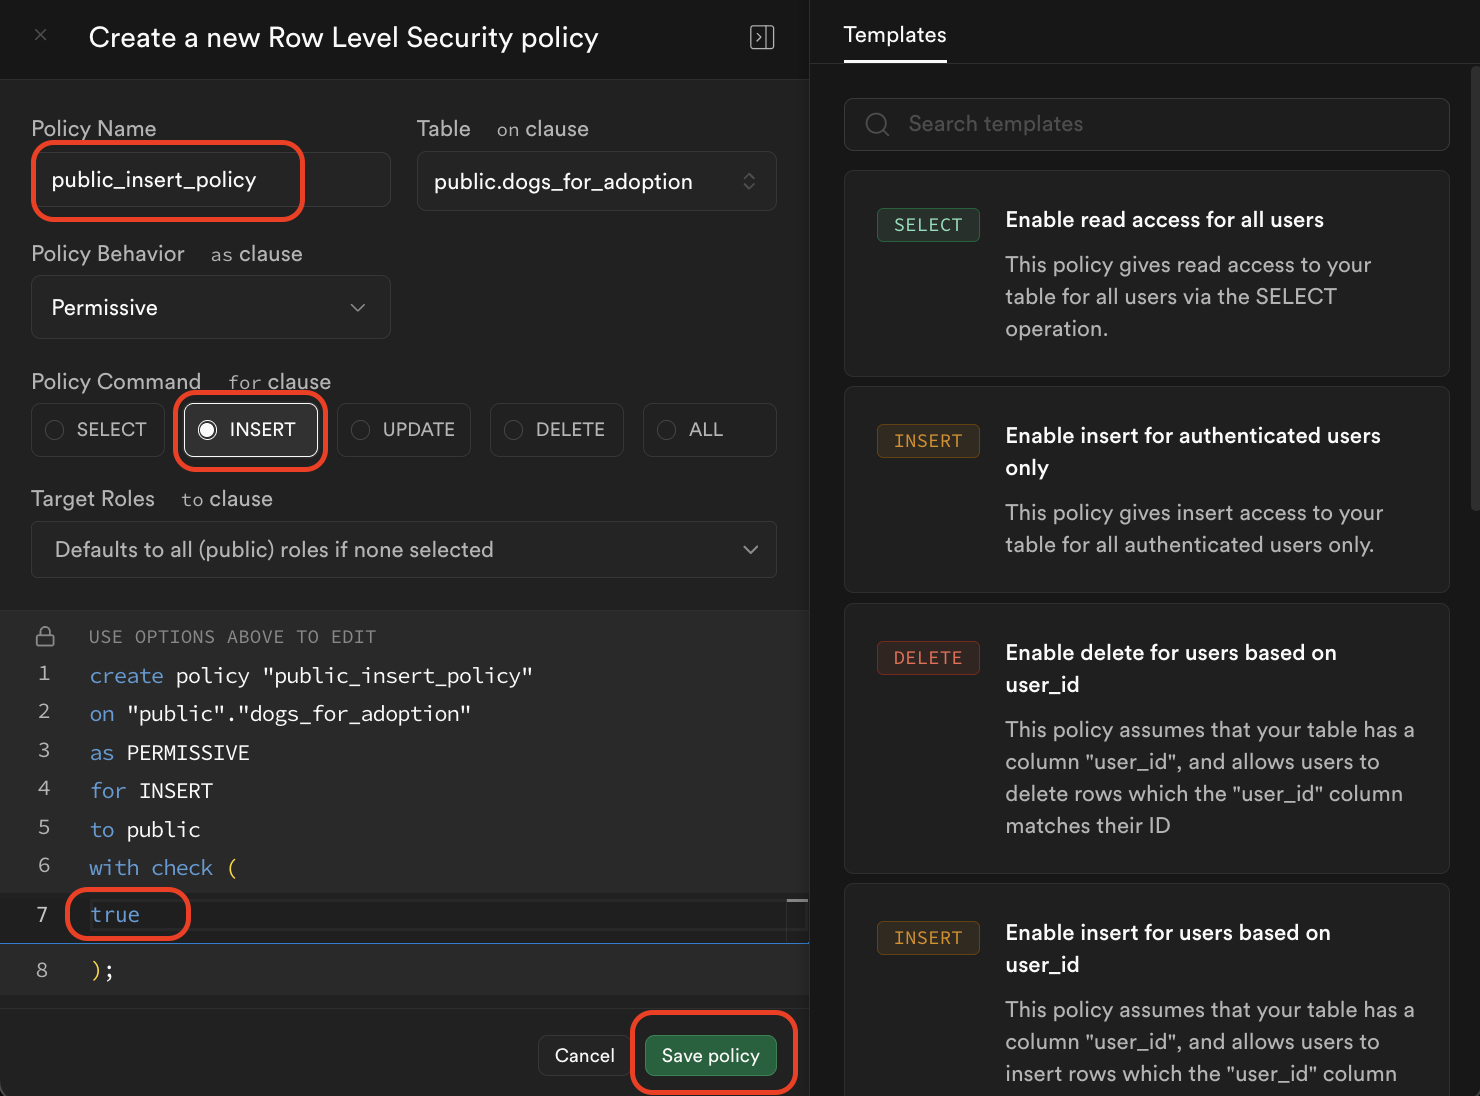
Steps:
- Give it a policy name (e.g., “Enable insert for all users”)
- Select “INSERT” operation
- Add
trueto the “with check” statement in the policy - Click “Save”
This allows anyone to create new rows in your table.
⚠️ Security Warning: Only use this for demo apps and learning! Real apps should authenticate users first.
✅ You’re All Set!
Your Supabase database is now ready to connect to your React app!
What you have:
- ✅ Supabase account
- ✅ Project created with database
- ✅ Table with columns defined
- ✅ Sample data inserted (at least 3 rows)
- ✅ Read policy enabled (SELECT)
- ✅ Write policy enabled (INSERT)
Next Steps
Connecting to React
You’ll need:
- Project URL - Found in Project Settings → API
- Anon (public) key - Found in Project Settings → API → Project API keys
Stay tuned for the React integration guide!
Coming Next:
- Installing Supabase client in React
- Fetching data from your table
- Creating new records from forms
- Real-time updates
🆘 Troubleshooting
Issue: Can’t see my data in the app
Solution:
- Check that RLS policies are enabled (Step 10-11)
- Verify you’re using the correct table name
- Check your API keys are correct
Issue: Can’t insert data
Solution:
- Make sure you have an INSERT policy (Step 11)
- Check required fields are filled
- Verify column types match your data
Issue: Forgot my database password
Solution:
- Go to Project Settings → Database
- Click “Reset database password”
- Generate a new password and save it!
📚 Resources
Official Documentation:
Video Tutorials:
🎯 Quick Reference
Supabase Dashboard Sections:
- Table Editor - View and edit your data
- SQL Editor - Write custom queries
- API Docs - Auto-generated API documentation
- Project Settings - Get your API keys and URLs
Common Terms:
- Table - Like a spreadsheet (e.g., todos, users)
- Row - One entry in your table
- Column - A field/property (e.g., task, completed)
- RLS - Row Level Security (controls who can access data)
- Policy - Security rule for your table
Congratulations! You’ve set up your first cloud database. You’re ready to build data-driven applications! 🚀
Attribution: This guide was created with assistance from Claude AI (Anthropic) to provide clear, step-by-step instructions for setting up Supabase.