codex-lv2-may-2025
Lesson: Exploring and Using Hugging Face Models (with Fireworks)
In this lesson, you will learn how to explore Hugging Face models, test them in the playground, and then generate code to call a model from your own webpage using the Fireworks inference provider.
See the google doc version of this guide here.
Step 1: Create Your Hugging Face Account
TODO:
- Go to https://huggingface.co
- Sign up for a free account (use your school email if required).
- Verify your email and log in.
Challenge:
- Customize your Hugging Face profile with a name or avatar.
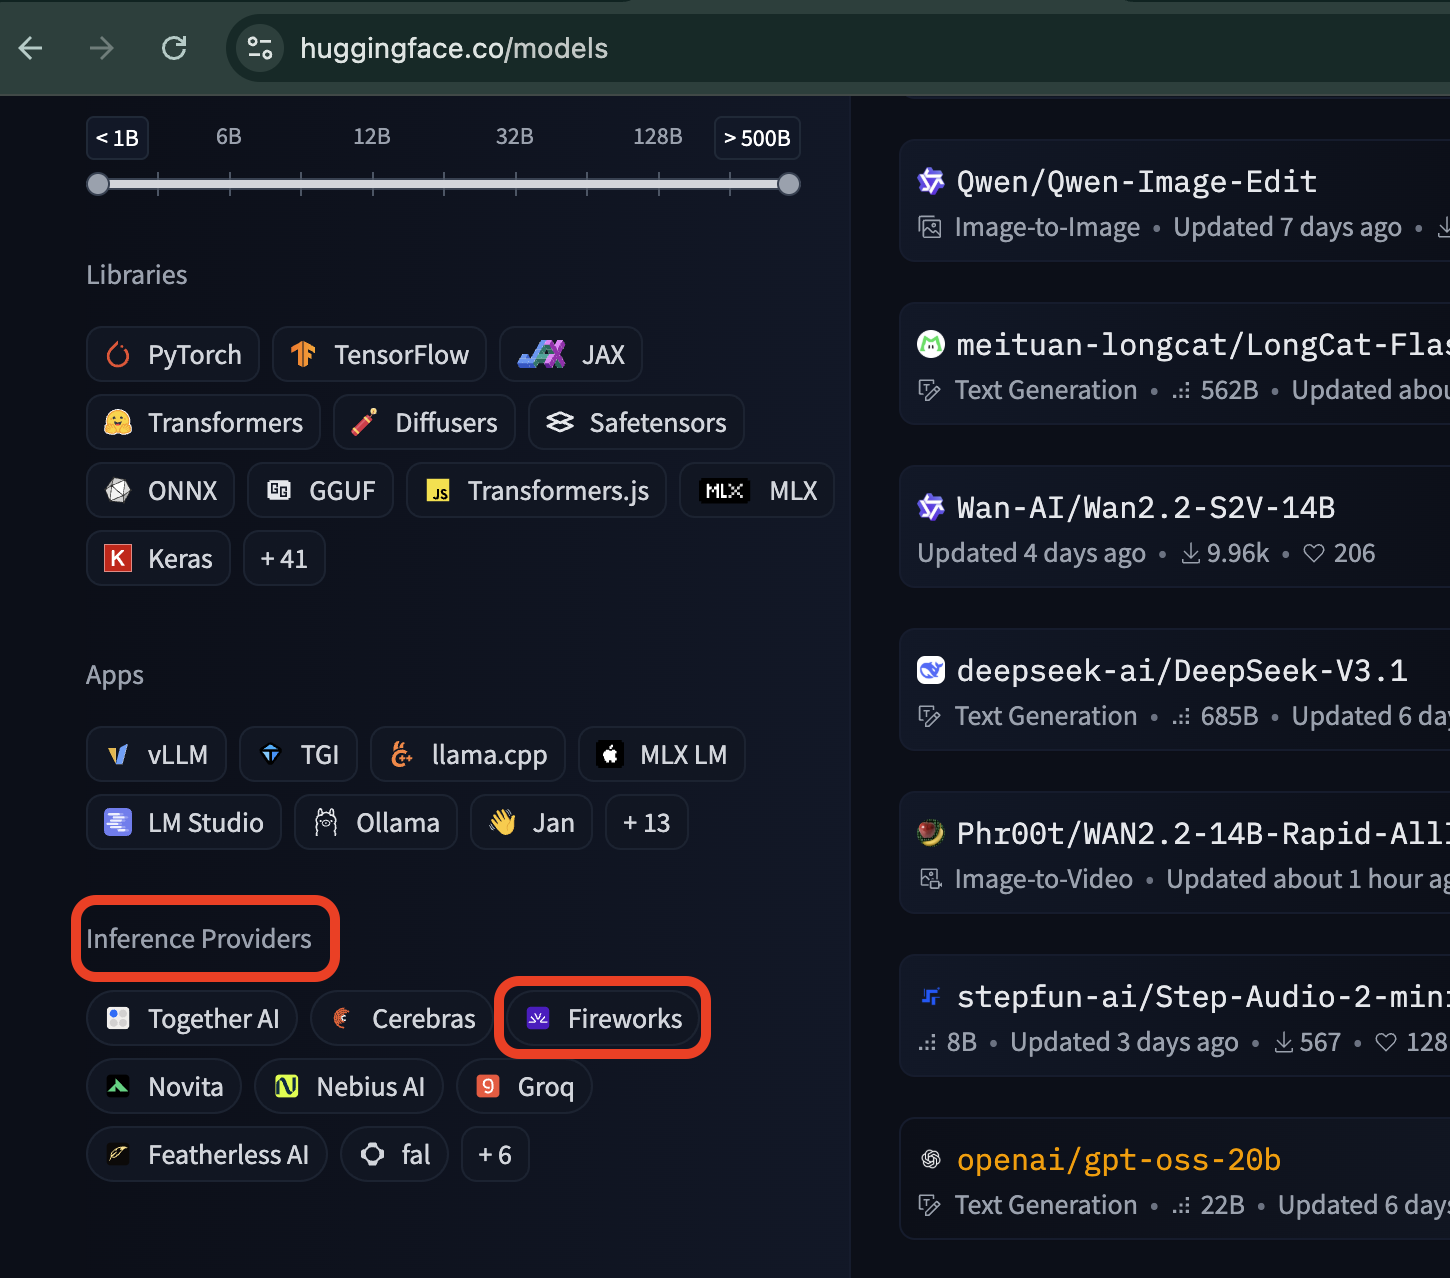
Step 2: Explore Models
TODO:
- Navigate to the Models tab.
- Use the filters: choose Text Generation as model type and Fireworks as inference provider.
- Browse through the models list.
Challenge:
- Try to find the largest Fireworks model and the smallest one. Compare their descriptions.
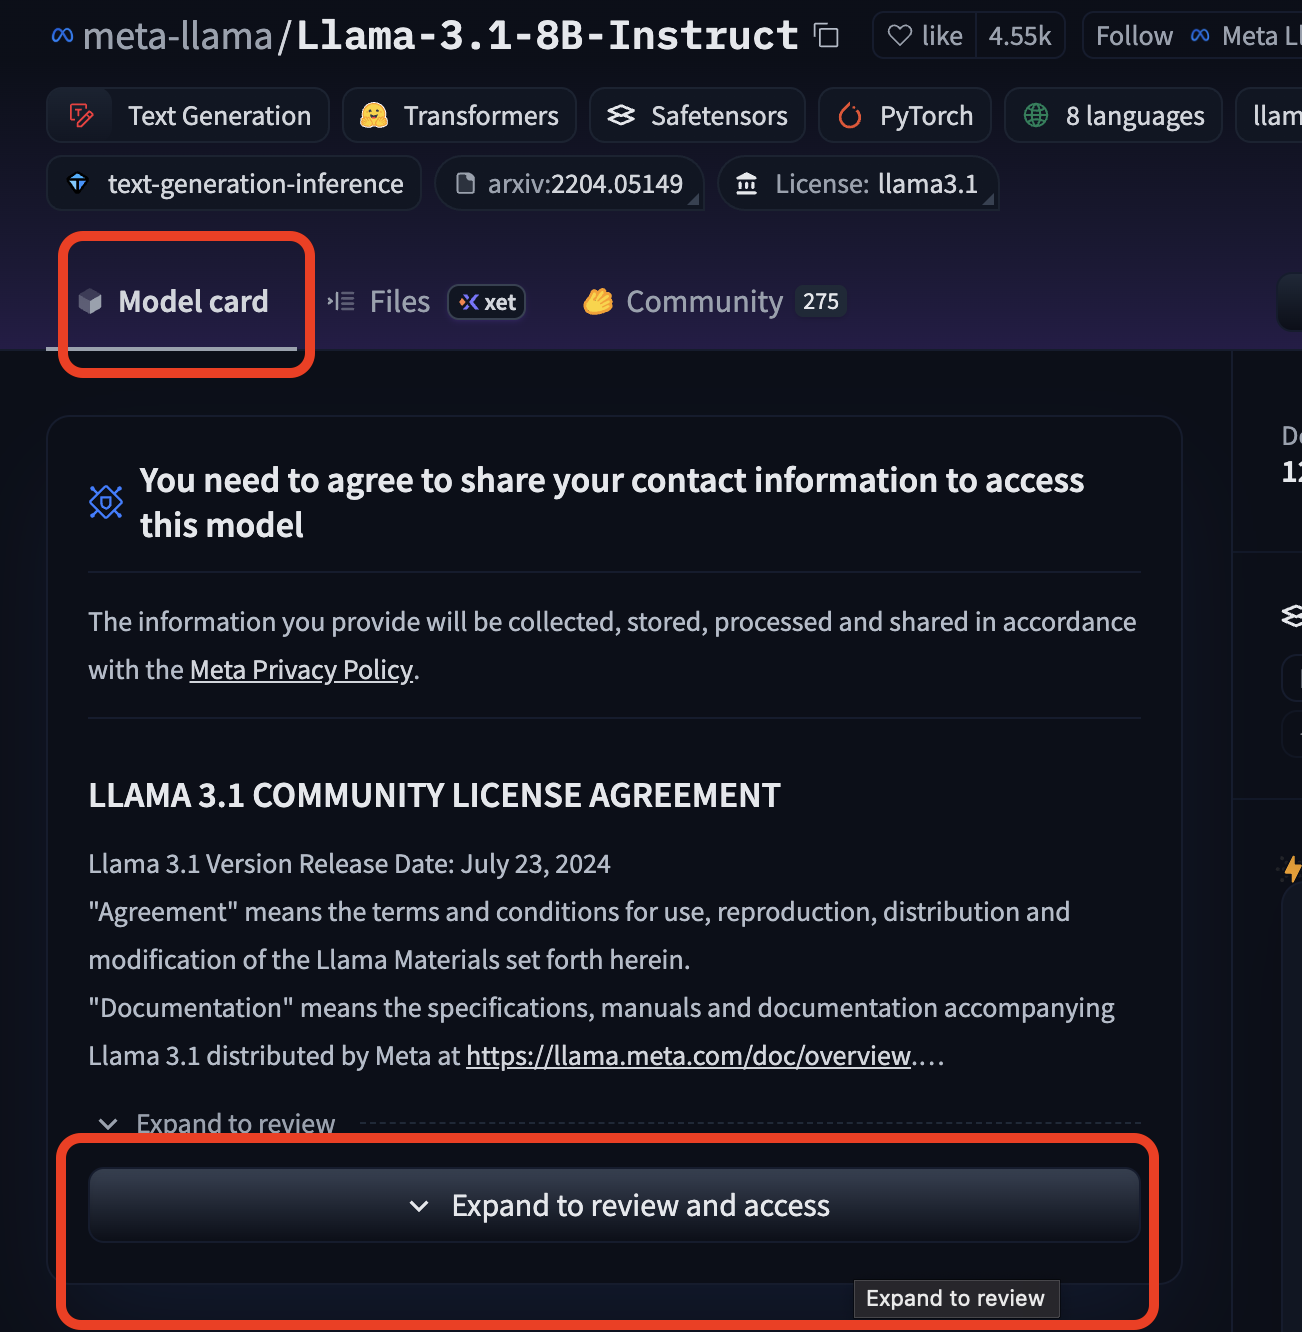
Step 3: Read Model Cards
TODO:
- Open a model page.
- Read the model card carefully (description, usage notes, licensing).
- Accept any usage terms if required.
Challenge:
- Summarize in your own words what the model is trained to do.
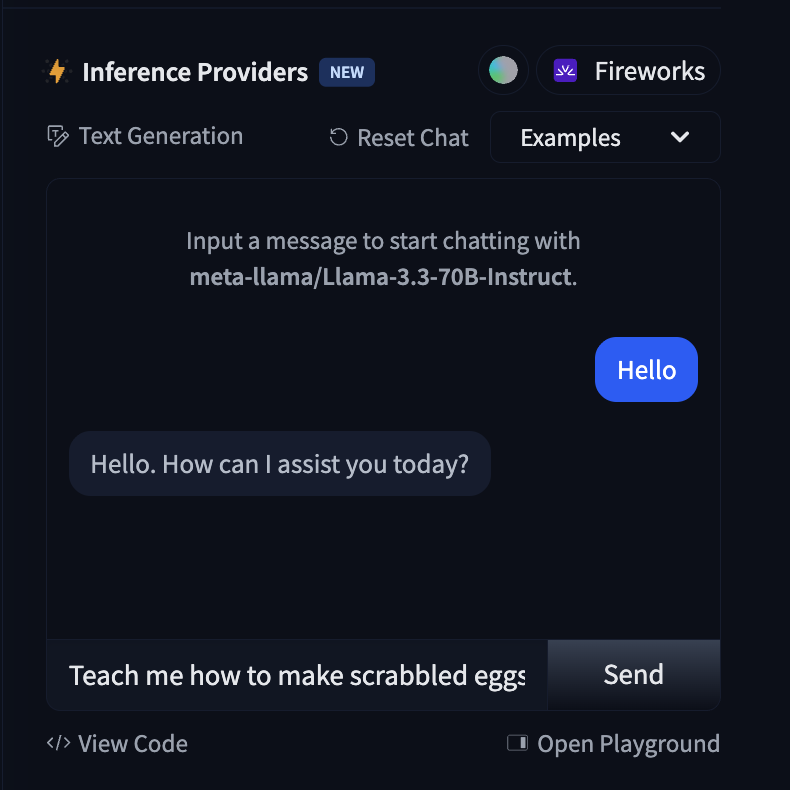
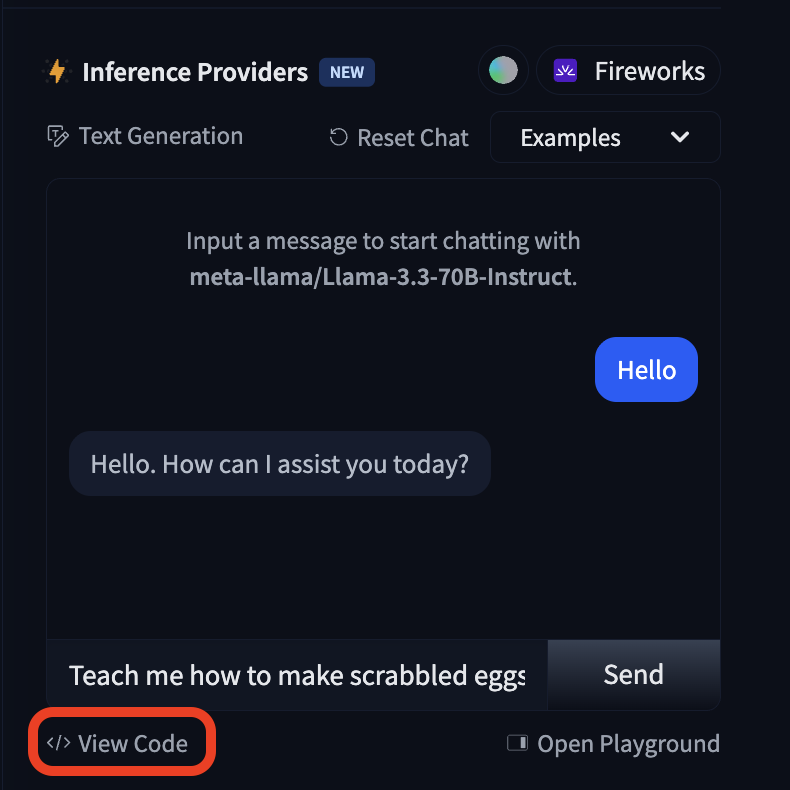
Step 4: Try Models on the Card Page
TODO:
- Use the “Try it out” box on the model page.
- Type in a prompt and click Send.
- Observe the output.
Challenge:
- Use the Playground (You will need a token from Step 7 for this.)
- Change the temperature or max tokens setting. How does the output change?
Step 5: Explore More Models
TODO:
- Repeat Steps 2–4 with a different text generation model.
- Try at least two other models.
Challenge:
- Try a model of a different type (for example: image generation).
- Generate an image and describe what you see.
Step 6: Set Up Your Project
TODO:
- Create a new folder/repo called
gen-ai-demo. - Inside, create the following files:
index.htmlscript.jssecret-variables.js.gitignore
Challenge:
- Add a simple HTML structure in
index.html(a heading and a button).
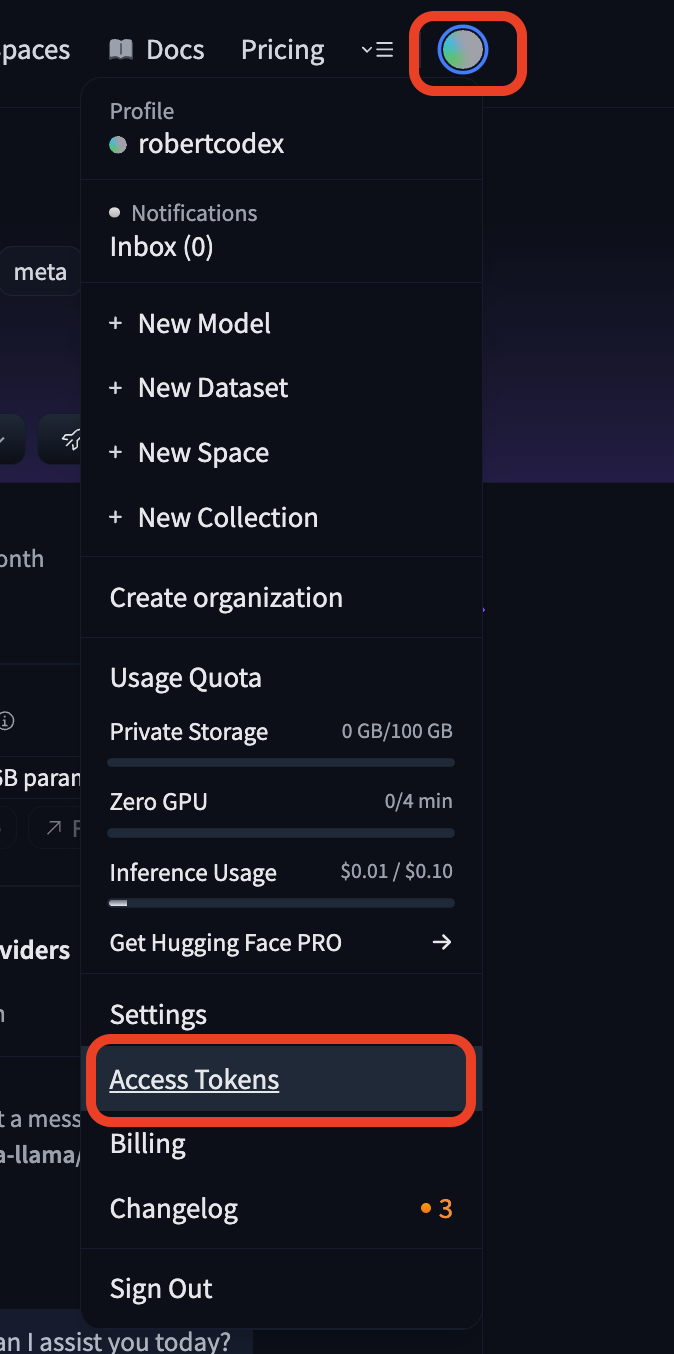
Step 7: Get Your API Token
TODO:
- In Hugging Face, go to Settings → Access Tokens.
- Create a new token with permissions to “Make calls to Inference Providers”.
- Copy the token.
- Keep it safe. You can’t copy it again! (But you can create a new one anytime.)
- In
secret-variables.jswrite:var HF_TOKEN = "your-token-goes-here";
Challenge:
- Should we share this token publicly? Why not?
- Go back the the Model Card page and try the Playground with your new token.
Step 8: Configure .gitignore
TODO:
- In
.gitignore, add:node_modules/ secret-variables.js .DS_Store Thumbs.db
Why this matters:
General Secrets Info
Think of your API token like the password to your house. You wouldn’t leave your house key taped to the front door, right? Similarly, you don’t want to leave your token sitting in plain sight where anyone can grab it. Tokens give access to powerful tools, and if someone else gets yours, they can run up costs or break rules under your name.
What is a .gitignore?
A .gitignore file is like a “do not pack” list when you’re moving. It tells Git which files to leave behind when you upload your project to GitHub. By putting secret-variables.js in .gitignore, you’re telling Git: “Never put this secret key in the moving truck.” That way your private stuff stays safe at home.
Deep Dive
When you commit files to Git without a .gitignore, everything—including secrets—goes into the repository history forever. Even if you delete it later, the secret can still be recovered from old versions. Hackers actually scan GitHub looking for exposed API tokens. Using .gitignore ensures your tokens never enter the history in the first place, which is the strongest protection.
Challenge:
- What could happen if you forget to add
secret-variables.jsto.gitignore?
Step 9: Generate Code
TODO:
- Go to a Hugging Face text generation model (Fireworks).
- Click “Use this model → Code → JavaScript (fetch)”.
- Copy the code.
- Paste it into
script.js.
Challenge:
- Find where in the code the API endpoint URL is specified.
Step 10: Add Your Token
TODO:
- Update the code in
script.jsto use your token fromsecret-variables.js. - Example:
headers: {
  Authorization: `Bearer ${HF_TOKEN}`,
  "Content-Type": "application/json"
}
Challenge:
- What error do you think will happen if you forget the
Authorizationheader?
Step 11: Run and Inspect
TODO:
- Open
index.htmlin your browser. - Open DevTools → Console.
- Trigger the script and observe the response JSON.
- Look at the Network tab to see the full request/response cycle.
📸 Screenshot Placeholder – Show the browser DevTools console and the JSON response.
Challenge:
- Copy part of the JSON response and explain what it means.
Step 12: Change Prompts
TODO:
- In
script.js, change the prompt to:{ role: "user", content: "Teach me how to make scrambled eggs" } - Run it again and check the output.
- Try other prompts of your choice (stories, jokes, explanations).
Challenge:
- Write a prompt that makes the model explain something in a particular style or manner.
- Example: “Explain how photosynthesis works as if you were a pirate captain giving a speech.”
Step 13: Console Log the Response Content
TODO:
- Update your code to extract the model’s response:
console.log(result.choices[0].message.content); - Refresh the page and check the console for the clean response text.
Challenge:
- Instead of just logging, display the response text in the HTML page.
✅ Learning Objectives
- Create a Hugging Face account and explore models in the playground.
- Read and interpret model cards.
- Safely create and use an API token.
- Copy and adapt Hugging Face’s auto-generated JavaScript fetch code.
- Run model inference in the browser, modify prompts, and display results.